As a continuation of Part 2: Swift Code Style
Never believe in “let’s do it quickly and then refactor it”.
Let’s talk about common architecture design patterns.
We started with VIPER design. Why?
It’s the best practice to decompose your system into a lot of small, single-responsibility blocks – it’s simple and doesn’t require a lot of time.
Many people write theoretical materials about VIPER and suggest that a development process with clean architecture requires a lot of time.
But it’s not true.
Why?
- First – We can generate a lot of reusable code using Generamba code generator and our own templates. *We’ll discover how to work with Generamba in our next articles.
- Second – When we work with VIPER, we develop our application using S.O.L.I.D. principles. This means that each component has a single responsibility. Components depend on abstractions. Code depends on classes – they are injected in module configurators. As a result, we have a flexible system that can extend and modify swiftly.
- Third – All our modules have excellent code coverage quality. This means that we have the possibility to detect our code smells/bugs during development and fix them before the QA round. This is a considerable time-saver too.
Ok, let’s discover each component.
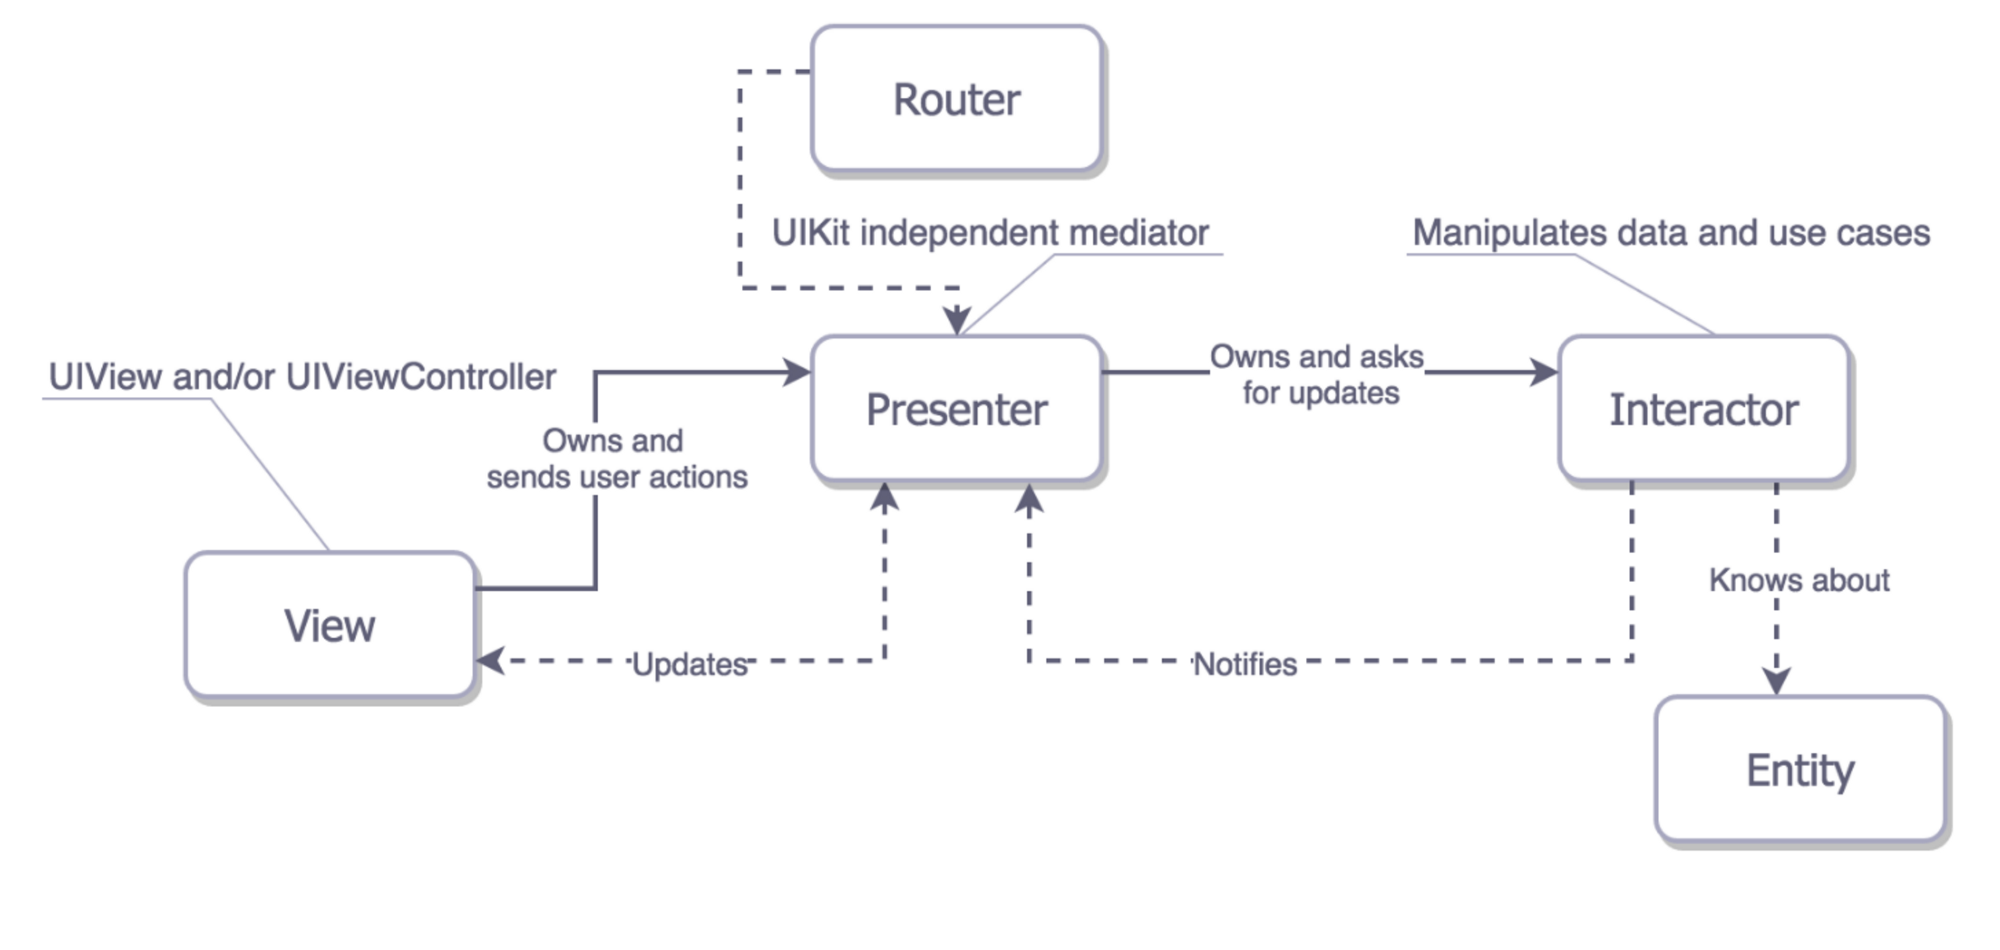
- View – This is a UIViewController, which has outlets to views and handles user interaction. View has 2 protocols.
View Input – implemented in View Layer and called from Presenter Layer.
*Display info on View, g. showProgress()
View Output – implemented in Presenter Layer and called from View Layer.
*Notify presenter about User actions,e.g. addNewItem() - Presenter – This is a class that communicates with View, Router and Interactor using next protocols.
View Output – look at View section.
Interactor Output – implemented in Presenter Layer and called from Interactor Layer.
*Notify presenter about updates,g. dataDidLoad()
View Input – look at View section.
Interactor Input – implemented in Interactor Layer and called from Presenter Layer.
*Asks for updates, e.g. loadItems()
Router Input – implemented in Router Layer and call from Presenter Layer.
*Navigate between modules, e.g. showDetailsModule() - Interactor – This is a class that communicates with Presenter and Entities. Interactor has 2 protocols.
Interactor Input – look at Presenter section.
Interactor Output – look at Presenter section. - Entity – These include any data representation such as CoreData Entity, Realm Object, etc.
- Configurator – One more thing.
VIPER has lots of components that we need to inject between.
Configurator injects layers between them.
This was a brief guide to the clean architecture VIPER.
Continue reading: iOS Best Practices. Part 4: S.O.L.I.D. >>>

Maxim Vialykh is CactusSoft iOS Tech Lead.
Technical Background
Programming languages: Swift, Objective-C, Java
Technologies and Platforms: iOS, Android, Windows Phone, Amazon S3, Google Cloud, Google APIs, Facebook APIs
Frameworks: PhoneGap, Xamarin
Tools: Invision, SVN, Git, PhoneGap, Titanium, Xamarin, Sketch, xCode, IntelliJ IDEA